
TLDR: Complete a seven-part walk-around before loading
Use this horse trailer pre trip checklist in the same order every time: review the route and paperwork; inspect the tow vehicle and hitch; check tires, brakes, lights, and breakaway equipment; examine the floor and horse compartment; confirm emergency supplies; assess the horse; and complete one final walk-around. If anything affecting structure, braking, coupling, tires, doors, or containment is questionable, postpone the trip until it is corrected.
The safest routine is calm and repetitive. Walk around the rig before the horse goes aboard, load only when the trailer is hitched or appropriately stabilized, and pause once more before moving. Then inspect the rig again after the first short stretch of travel or at the first safe stopping place. That habit catches a loose latch, shifted item, abnormal tire, or electrical problem before it becomes a larger concern.
Horse trailer pre-trip checklist at a glance
- Plan and paperwork: Confirm the route, weather, fuel stops, destination contact, safe stopping options, and current movement or event documents.
- Tow vehicle and hitch: Check the vehicle, mirrors, coupler, latch, locking pin, jack, safety chains, breakaway cable, electrical plug, and brake controller.
- Trailer exterior: Inspect tires, wheels, spare tire, lamps, turn signals, brake lights, reflectors, wiring, doors, ramps, and exterior latches.
- Horse compartment: Examine the floor beneath movable mats, walls, dividers, bars, gates, padding, windows, screens, vents, loose hardware, and sharp edges.
- Emergency equipment: Carry human and equine first-aid supplies, roadside warning equipment, tire-changing tools, emergency contacts, water, and a usable spare tire.
- Horse readiness: Confirm that the horse appears fit to travel and that familiar halters, lead ropes, and any appropriate protective equipment are ready.
- Final departure check: Secure doors and gates according to the trailer design, count horses, clear the area, test the brakes at low speed where safe, and walk around once more.
1. Plan the trip and verify the paperwork
A sound trailer does not compensate for an improvised route. Before hitching, check the weather and identify roads, fuel stops, and stopping places suitable for the length and maneuvering needs of your rig. Keep the destination address and contact number available without relying entirely on a mobile signal. If a road closure or mechanical problem changes the plan, you should already know whom to call.
Verify health, identification, destination, and event requirements for the specific journey. USDA APHIS states that most states require individually identified horses moving interstate to be accompanied by a Certificate of Veterinary Inspection. The importing state determines additional requirements, which may include equine infectious anemia testing. Rules can vary and change, so consult the current destination requirements, event organizer, and veterinarian rather than reusing assumptions from an earlier trip. The USDA APHIS interstate movement guidance is a useful starting point for interstate travel.
Place documents where they remain clean, legible, and accessible from outside the horse compartment. Useful records may include the applicable health certificate, test records, horse identification, registration or ownership records, destination information, veterinarian contacts, and insurance or roadside-assistance details. Not every document is required for every trip, but discovering a missing paper at a checkpoint or event gate is avoidable.
2. Inspect the tow vehicle and hitch connection
Begin with the tow vehicle. Look for warning lights, obvious fluid leaks, tire damage, inadequate fuel, and anything unsecured in the cab or bed. Confirm that the vehicle, hitch, and trailer arrangement complies with their manufacturers’ ratings and instructions. Actual loaded weight matters; an empty-trailer figure does not account for horses, water, feed, tack, or equipment.
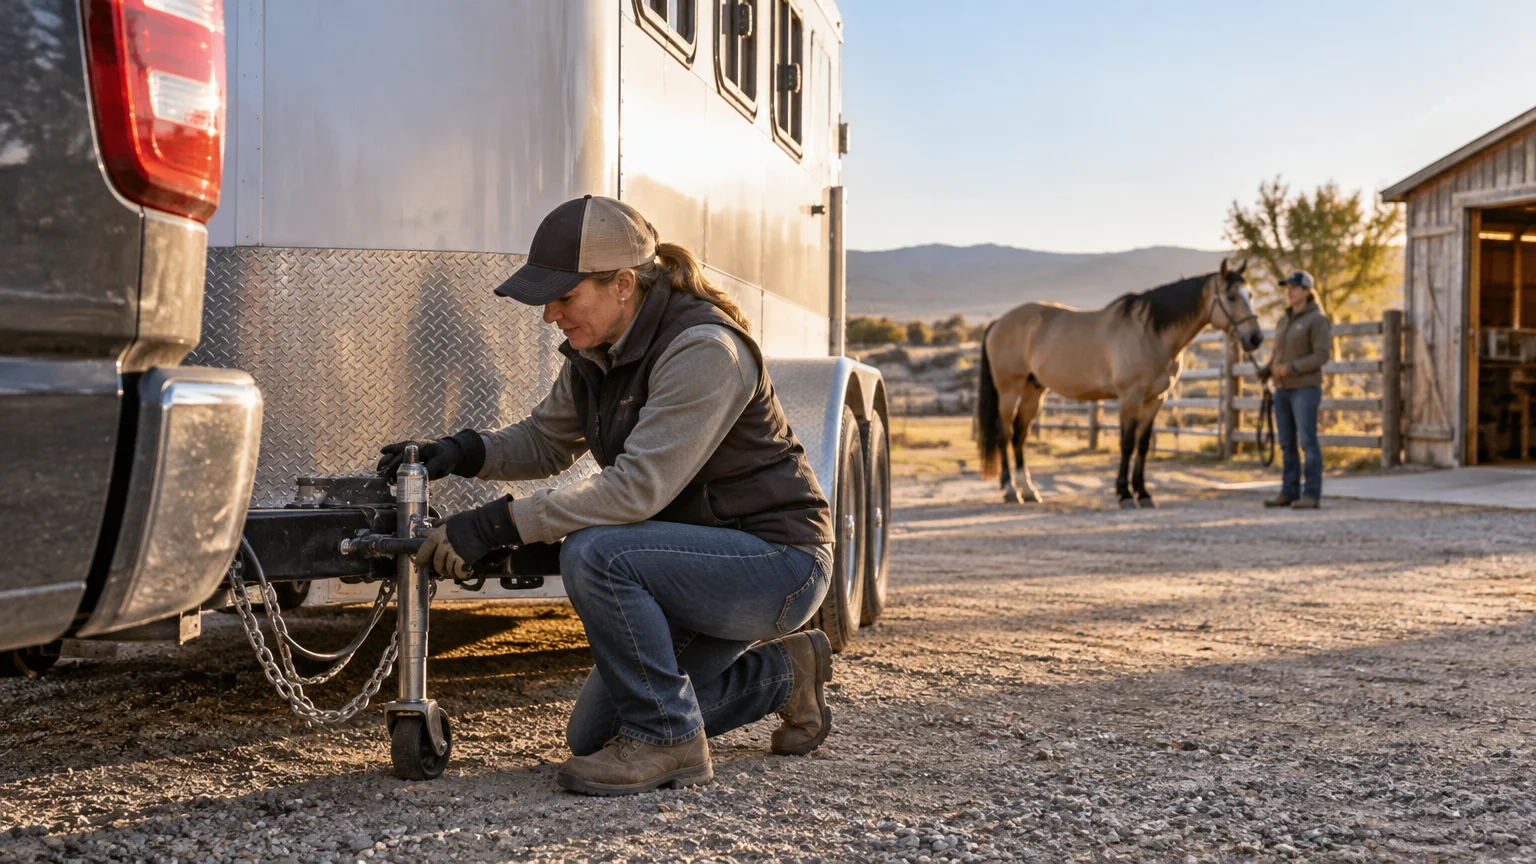
At the hitch, confirm that the ball and coupler are the correct match, the coupler is fully seated and locked, and the drawbar or receiver pin is secured. Raise the jack completely for travel and make sure it cannot drop. Cross the safety chains beneath the tongue without allowing them to drag or bind during turns. Secure the electrical connector, then attach the breakaway cable as directed for the equipment rather than wrapping it around a part that could separate with the hitch. Purdue’s trailer-rig guidance identifies these as core connection checks.
Do not rely on the appearance of the coupler latch alone. After coupling and locking it, use the jack to apply a modest upward test consistent with the hitch manufacturer’s directions. The purpose is to confirm that the coupler remains seated on the ball. Lower and fully retract the jack afterward. If the components do not seat cleanly or the latch is damaged, stop and repair the connection rather than forcing it.
3. Check tires, wheels, brakes, and lights
Check every tow-vehicle and trailer tire, including the spare. Use a tire-pressure gauge and follow the applicable tire, vehicle, and trailer guidance for inflation. Look beyond air pressure: inspect for cuts, bulges, cracking, embedded objects, unusual wear, exposed material, or other visible damage. Confirm adequate tread and look for missing, damaged, or visibly loose lug nuts. A spare is useful only when it is inflated, compatible, and accompanied by a jack, lug wrench, and other equipment capable of handling the rig.
Have another person operate the tow-vehicle controls while you confirm running lamps, turn signals, brake lamps, and other fitted trailer lights. Examine reflectors, plugs, and visible wiring as well. A light that worked on the previous trip can fail because of a loose plug, corroded contact, damaged wire, or bulb problem.
Confirm that the in-cab brake controller powers up and is set according to the controller, tow vehicle, and trailer instructions. Inspect the breakaway cable, switch, and battery for obvious damage or disconnection. Where conditions permit, make a controlled low-speed brake check before entering traffic. Trailer brakes and breakaway equipment are safety systems, not substitutes for correct loading or conservative driving.
4. Examine the floor and horse compartment
Inspect the empty compartment before loading. Move or lift mats when practical so you can see the supporting floor rather than judging it through rubber. Mats can conceal rot in wood, corrosion in metal, cracks, trapped moisture, or weakened areas. Check ramps and their supporting structures for deterioration or damage as well. If the floor feels soft, flexes abnormally, shows serious corrosion, or cannot be evaluated confidently, keep the horse off it until a qualified professional has inspected it.
Continue from the floor upward. Check walls, mats, padding, dividers, gates, breast or butt bars where fitted, escape doors, loading doors, ramps, hinges, pins, and latches. Look for protruding fasteners, sharp edges, splintered material, loose hardware, exposed wiring, and gaps that could catch a hoof, halter, or leg. Operate each moving part rather than merely looking at it. A latch should close positively and remain secured in the manner intended by the manufacturer.
Ventilation openings should provide airflow without creating an avoidable escape opening or exposing the horse directly to flying debris. University of Minnesota Extension cautions against traveling with open, unscreened windows, while Purdue recommends screens for drop-down windows. Inspect screens, bars, vents, and window latches, then configure them for the weather and trailer design.
Remove loose buckets, tools, tack, and other objects that could move into the horse’s space. Secure approved equipment in its proper location and keep aisle areas clear. The details differ among straight-load, slant-load, stock, bumper-pull, gooseneck, and living-quarters trailers, so follow the operating instructions for the particular trailer rather than applying one universal divider or door sequence.
5. Keep emergency gear accessible
Emergency equipment should be reachable without unloading a horse or entering a dangerous traffic lane. A practical kit can include human and equine first-aid supplies, reflective warning devices, flashlights with spare power, work gloves, a fire extinguisher suitable for the rig, water, basic hand tools, tire-changing equipment, and emergency contact information. Extension guidance supports carrying roadside supplies, first-aid materials, and the equipment needed to change a tire.
Match the kit to the journey. Remote routes may justify additional water, weather protection, maps, and backup communication plans. Medication and first-aid choices should reflect veterinary advice and the person’s ability to use them properly. Labeling cases by function—first aid, roadside equipment, documents, and horse identification—can save time, but organization never replaces inspecting the contents and removing expired or damaged items.
6. Assess the horse before loading
Pause long enough to look at the horse as an individual. Note attitude, breathing, movement, appetite, hydration concerns, and any injury or illness that could make travel inappropriate. If the horse appears unwell, painful, unusually stiff, or different from its normal baseline, contact a veterinarian when warranted rather than letting the schedule make the decision. Knowing the horse’s usual way of going—including the individual variation discussed in assessing movement and balance in Colonial Spanish-type horses—makes a meaningful change easier to recognize.
Use familiar, properly fitted transport equipment. Check the halter, lead, ties, and any boots or wraps for wear and correct fit. Travel day is not the ideal time to introduce equipment the horse has never worn. A horse that is anxious about loading also needs a training plan, not escalating pressure beside a deadline.
Load only when the trailer is hitched to the tow vehicle or otherwise appropriately stabilized. Mississippi State University Extension specifically advises against loading a horse into an unhitched trailer. Follow the trailer manufacturer’s sequence for dividers, bars, gates, ties, and doors. That sequence varies by configuration, and handlers should avoid standing where a horse or moving partition could trap them.
Every-trip checks versus periodic attention
| Check before every trip | Schedule periodic maintenance or professional inspection |
|---|---|
| Hitch seating, latch, locking pin, chains, breakaway cable, plug, and jack position | Hitch wear, mounting hardware, coupler condition, and structural attachment |
| Tire pressure and visible condition; wheels and lug nuts; usable spare | Tire age and internal condition, wheel service, alignment, and replacement decisions |
| Brake controller indication, breakaway components, and controlled low-speed brake response | Brake adjustment, wear inspection, electrical diagnosis, and bearing service |
| All fitted lamps, signals, reflectors, plugs, and visible wiring | Corrosion repair, rewiring, connector replacement, and lighting upgrades |
| Visible floor, ramp, mat, door, divider, bar, gate, and latch condition | Detailed structural inspection and repair of wood, aluminum, steel, welds, fasteners, and supports |
| Screens, vents, windows, interior hazards, and secured equipment | Ventilation hardware, seals, hinges, springs, padding, and damaged fixtures |
There is no responsible universal service interval for every trailer component. Trailer type, materials, mileage, storage, climate, loading, road conditions, and manufacturer instructions all matter. Keep maintenance records and use the schedules specified for the tow vehicle, trailer, brakes, tires, bearings, and installed equipment. A pre-trip visual check cannot replace proper servicing.
7. Make the final departure check
Once the horse is loaded, walk around the entire combination without rushing. Count the horses. Confirm the loading door, escape door, ramps, gates, dividers, bars, windows, tack compartments, and exterior storage are secured. Check that the jack is raised, wheel chocks have been removed, steps are stowed, cords are disconnected, and nothing remains on the fender, bumper, roof, or ground.
Look underneath for anything hanging or leaking. Check the hitch, chains, breakaway cable, electrical plug, and lights one last time. Adjust mirrors and confirm the path ahead is clear before moving. Accelerate, turn, and brake smoothly while listening and feeling for anything unusual.
At the first safe stopping place after a short initial drive, inspect the rig again. Look at the tires and wheels without touching potentially hot components, recheck doors and latches, examine the hitch connections, and observe the horse calmly from a safe position. Repeat appropriate checks at later stops and after rough roads.
Make the checklist part of every departure
Keep a printed copy in the tow vehicle and follow it in the same physical order: cab, hitch, driver’s side, rear, horse compartment, passenger side, paperwork, horse, and final lap. Do not treat familiarity as proof that everything is ready. The best horse trailer pre-trip checklist is the one used before every trip, including the short, familiar haul when it is easiest to become casual.
For the next trip, allow enough time to complete the inspection before the horse is waiting at the ramp. If a critical component is damaged or uncertain, the practical decision is simple: unload if necessary, repair the problem, and travel later. Protecting the horse begins before the wheels turn.
References
- Interstate Movement of Cattle, Horses, Swine, Sheep & Goats | APHIS
- NVAP Reference Guide: Interstate Regulations | APHIS
- UNDERSTANDING THE HORSE TRAILER RIG: STEPS FOR TRANSPORTING HORSES SAFELY ON THE HIGHWAY
- PPP-114
Understanding the
Horse Trailer Rig
Steps - Fact Sheet FS-932
- Caring for horses on a budget
- Basic Horse Safety | Mississippi State University Extension Service